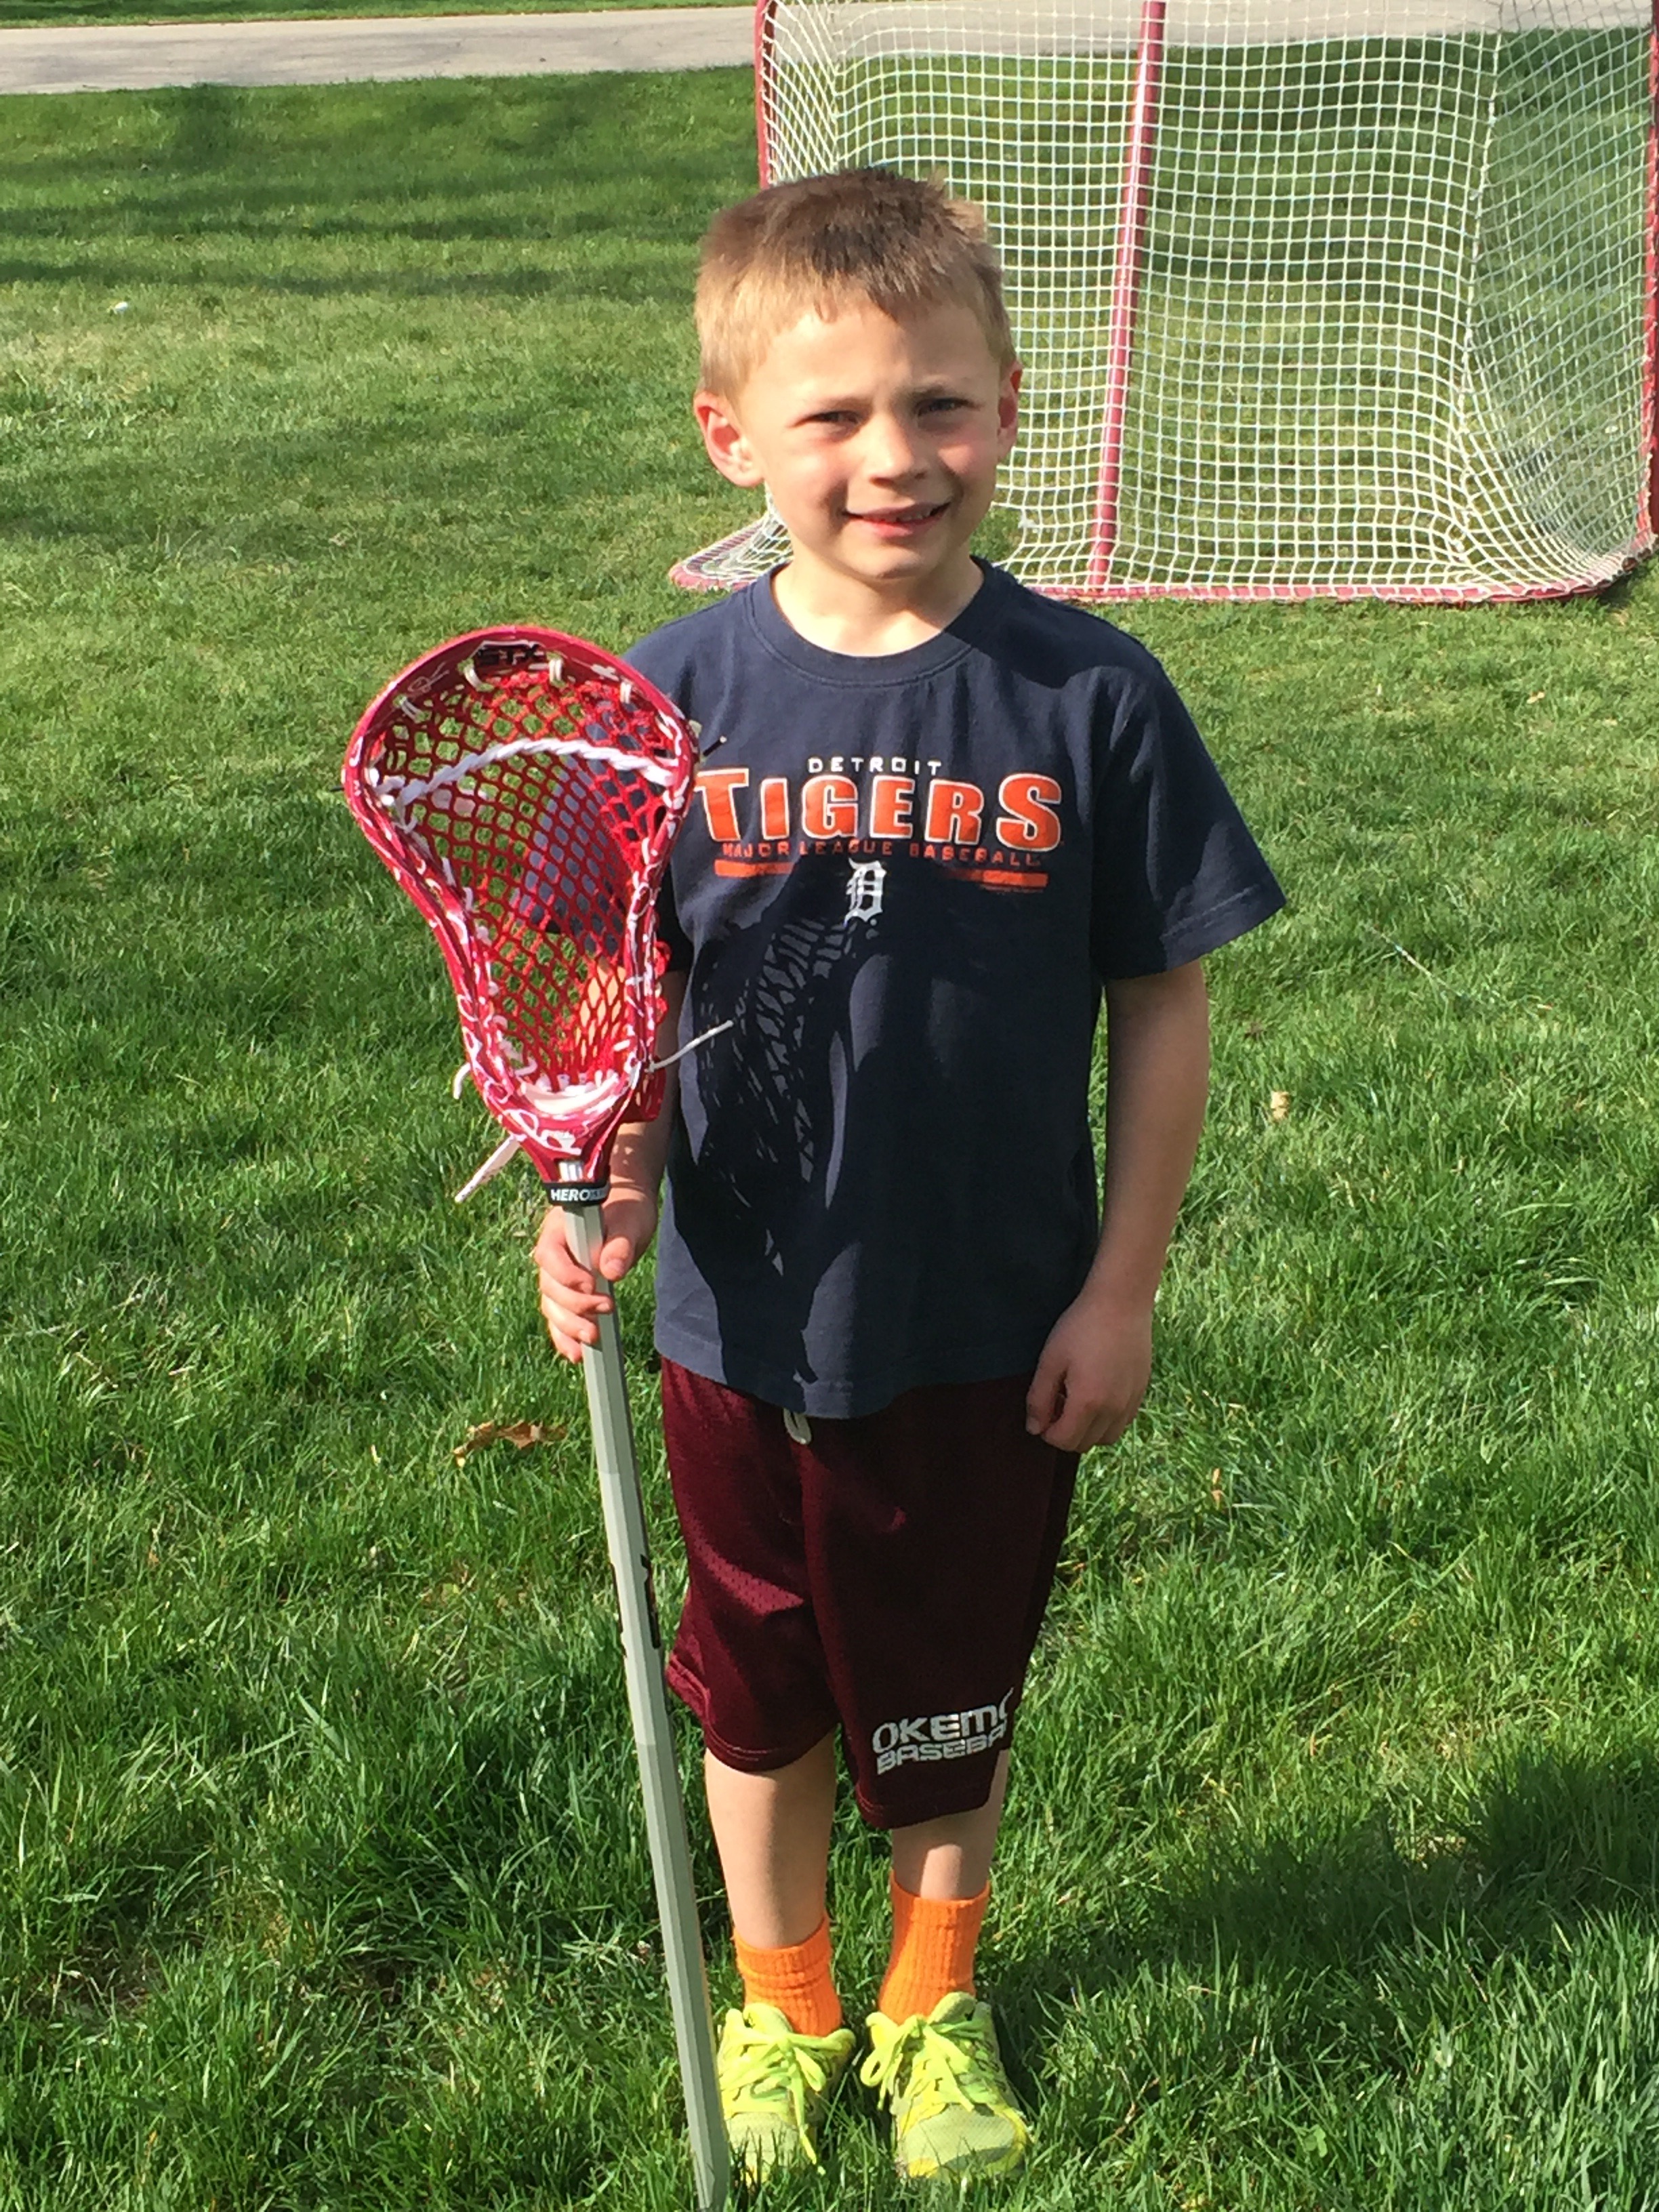
So my son made one of these before a few years back but now my youngest wanted to do it to his stick too, so we went to the store, got the dye and glue sticks and got to town.
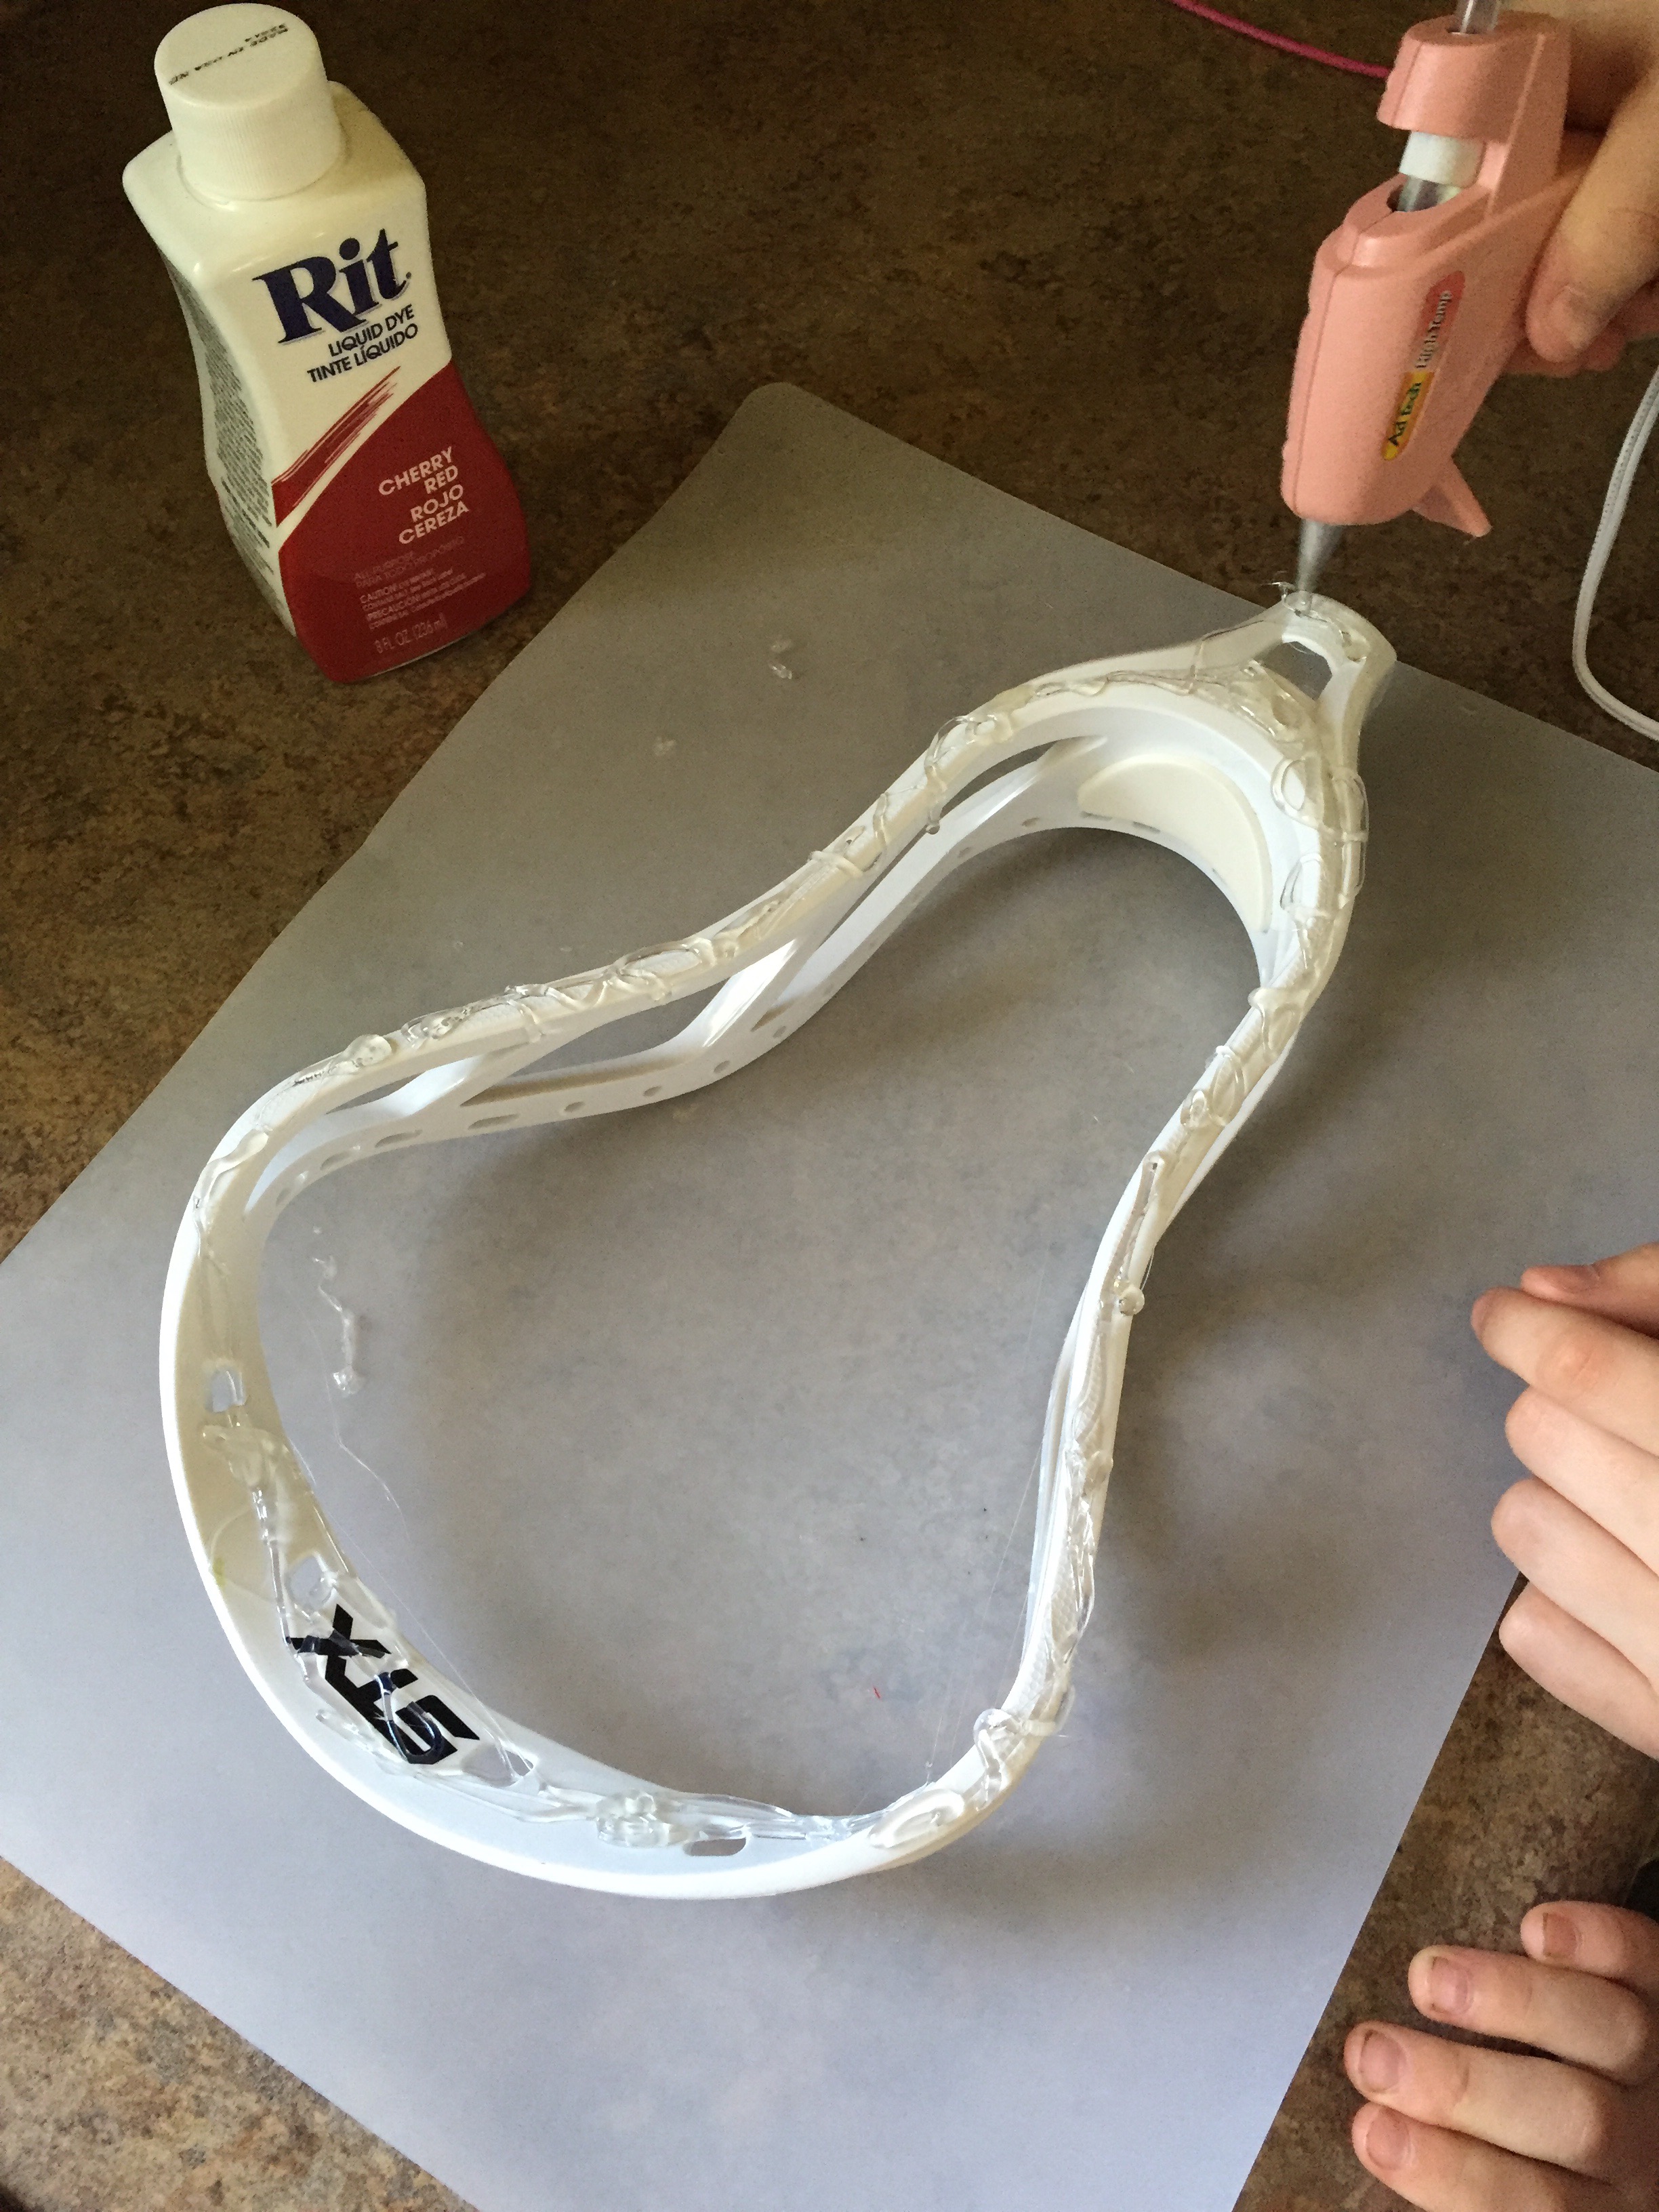
His lacrosse head was all white so he wanted to make it our school colors (maroon and white) so we picked up Red Rit Dye to help change the color.
Thing you need:
Lacrosse head
Hot glue gun and glue sticks
Rit Dye
Large stock pot
Water
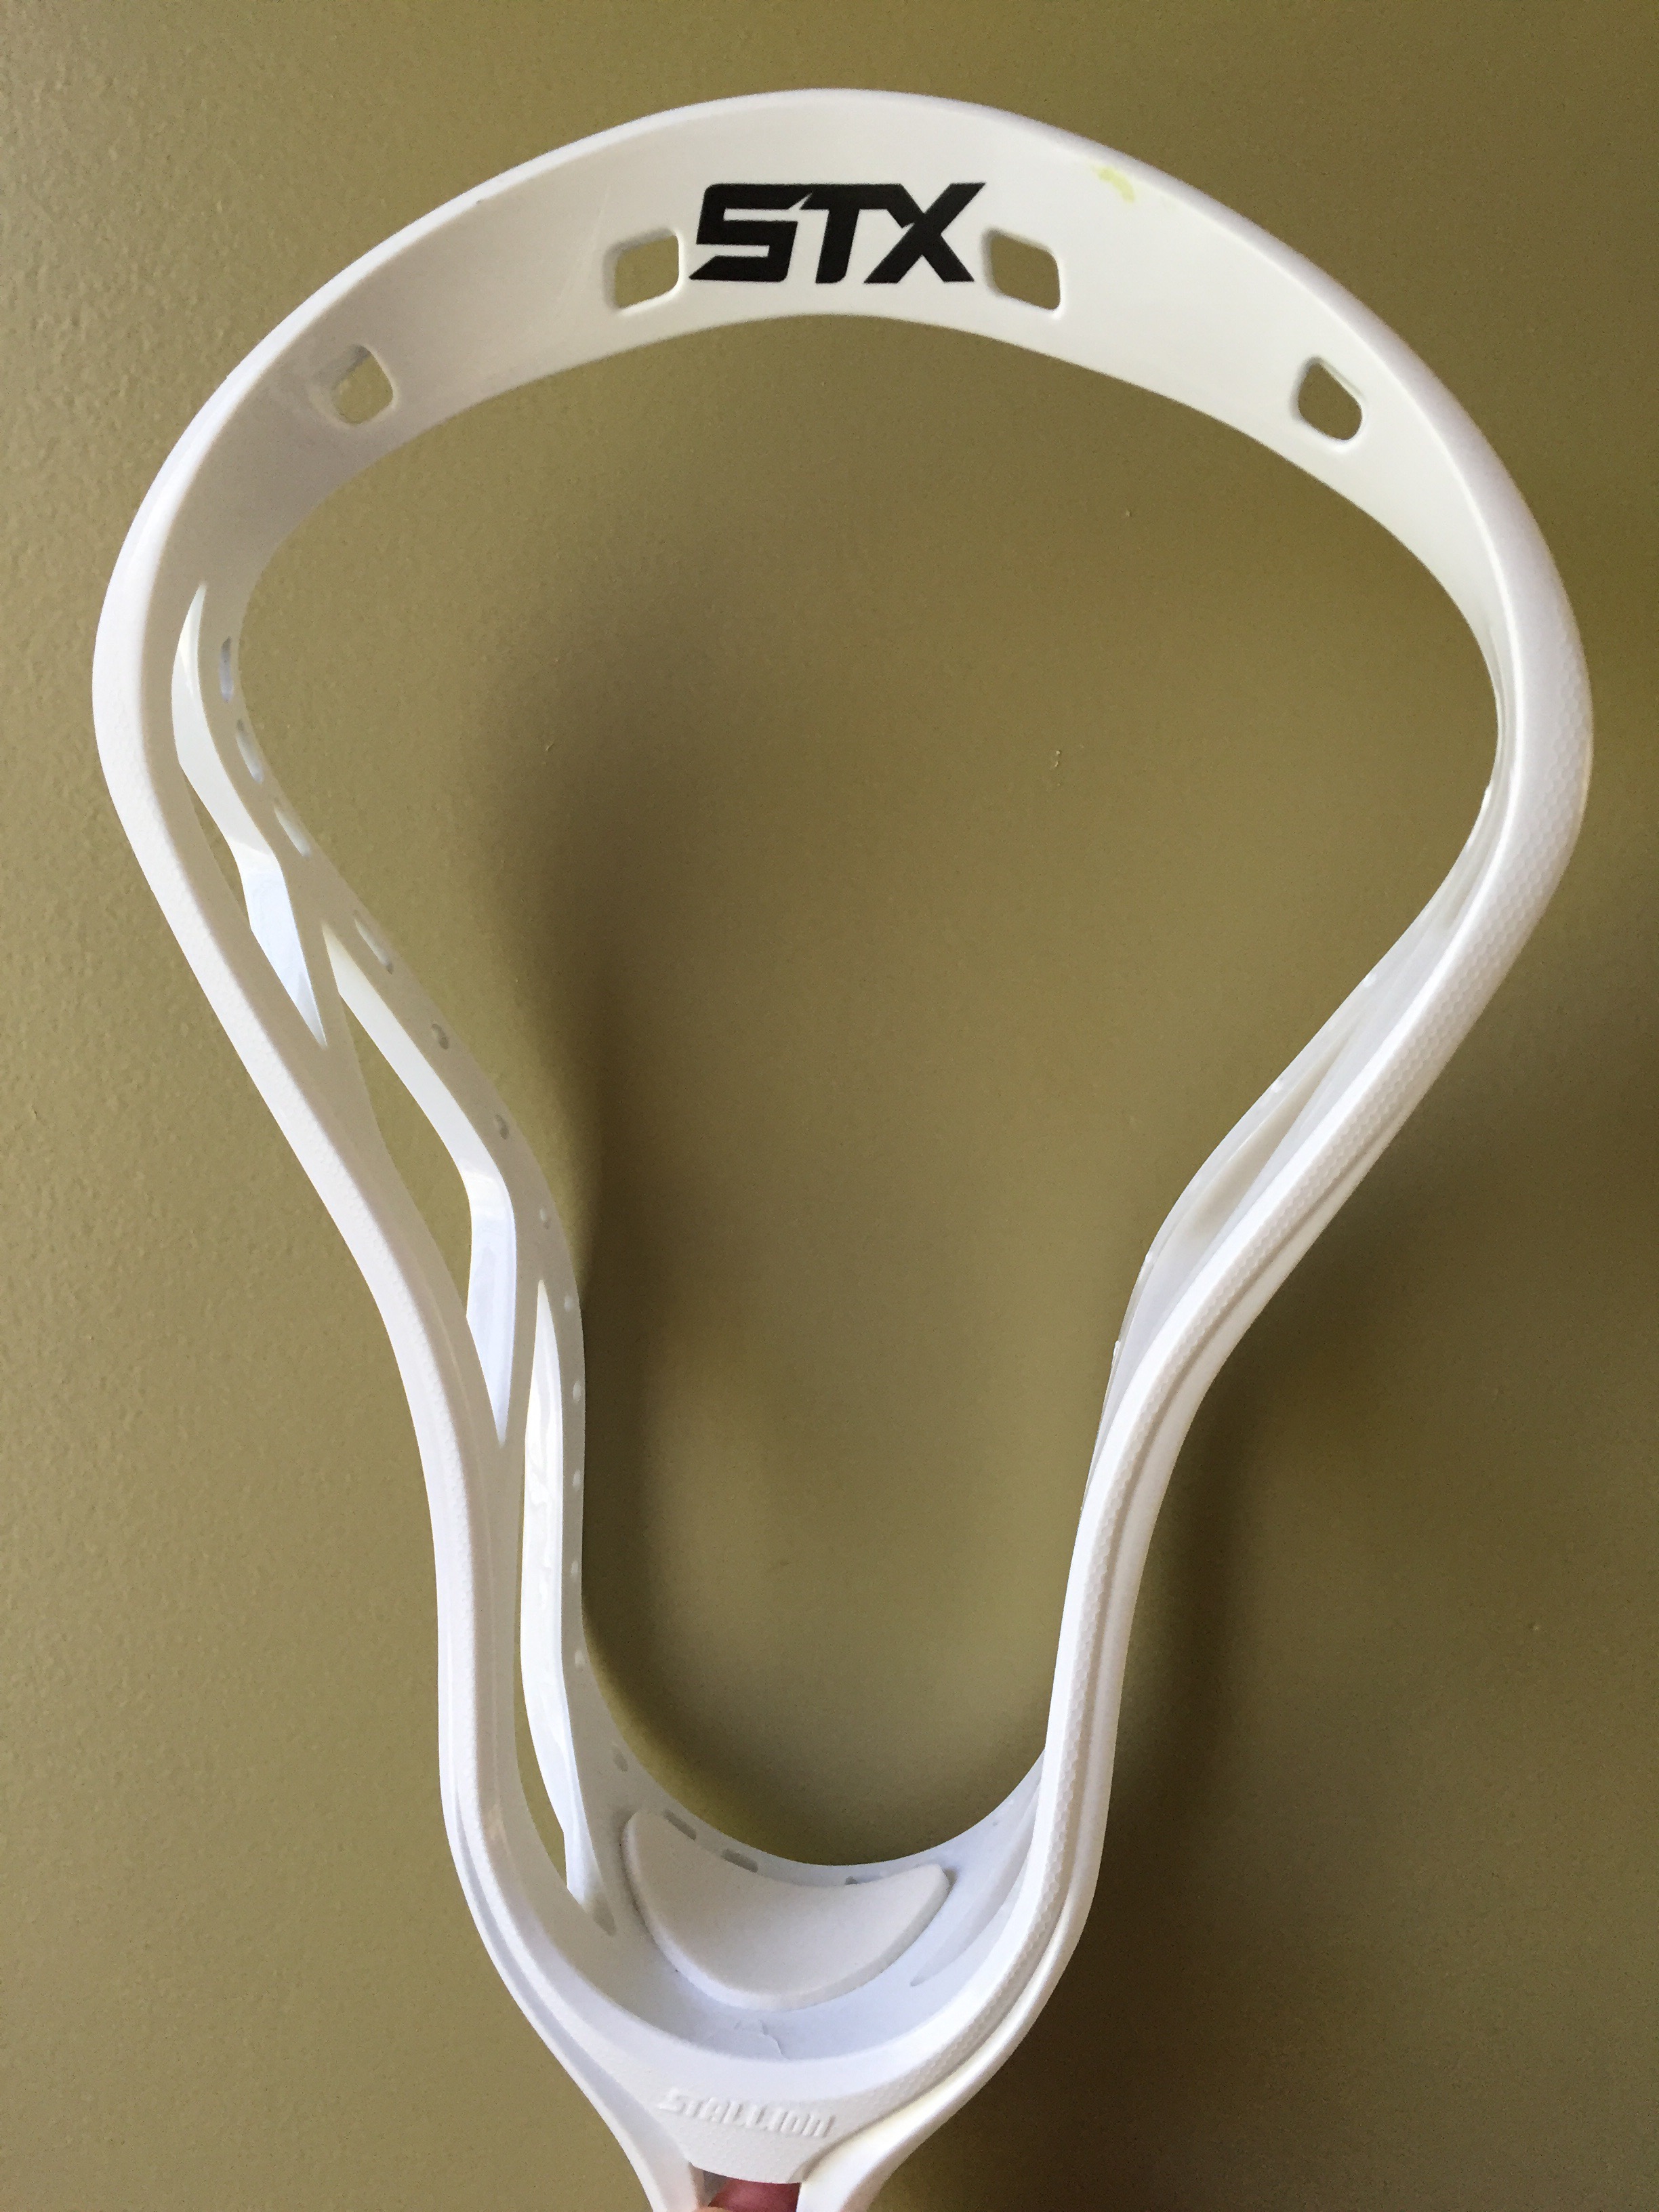
Start off by randomly putting hot glue all over the head. Make patterns or just do it randomly. Whatever color you put the hot glue on, that will be the color underneath. That color will not change.
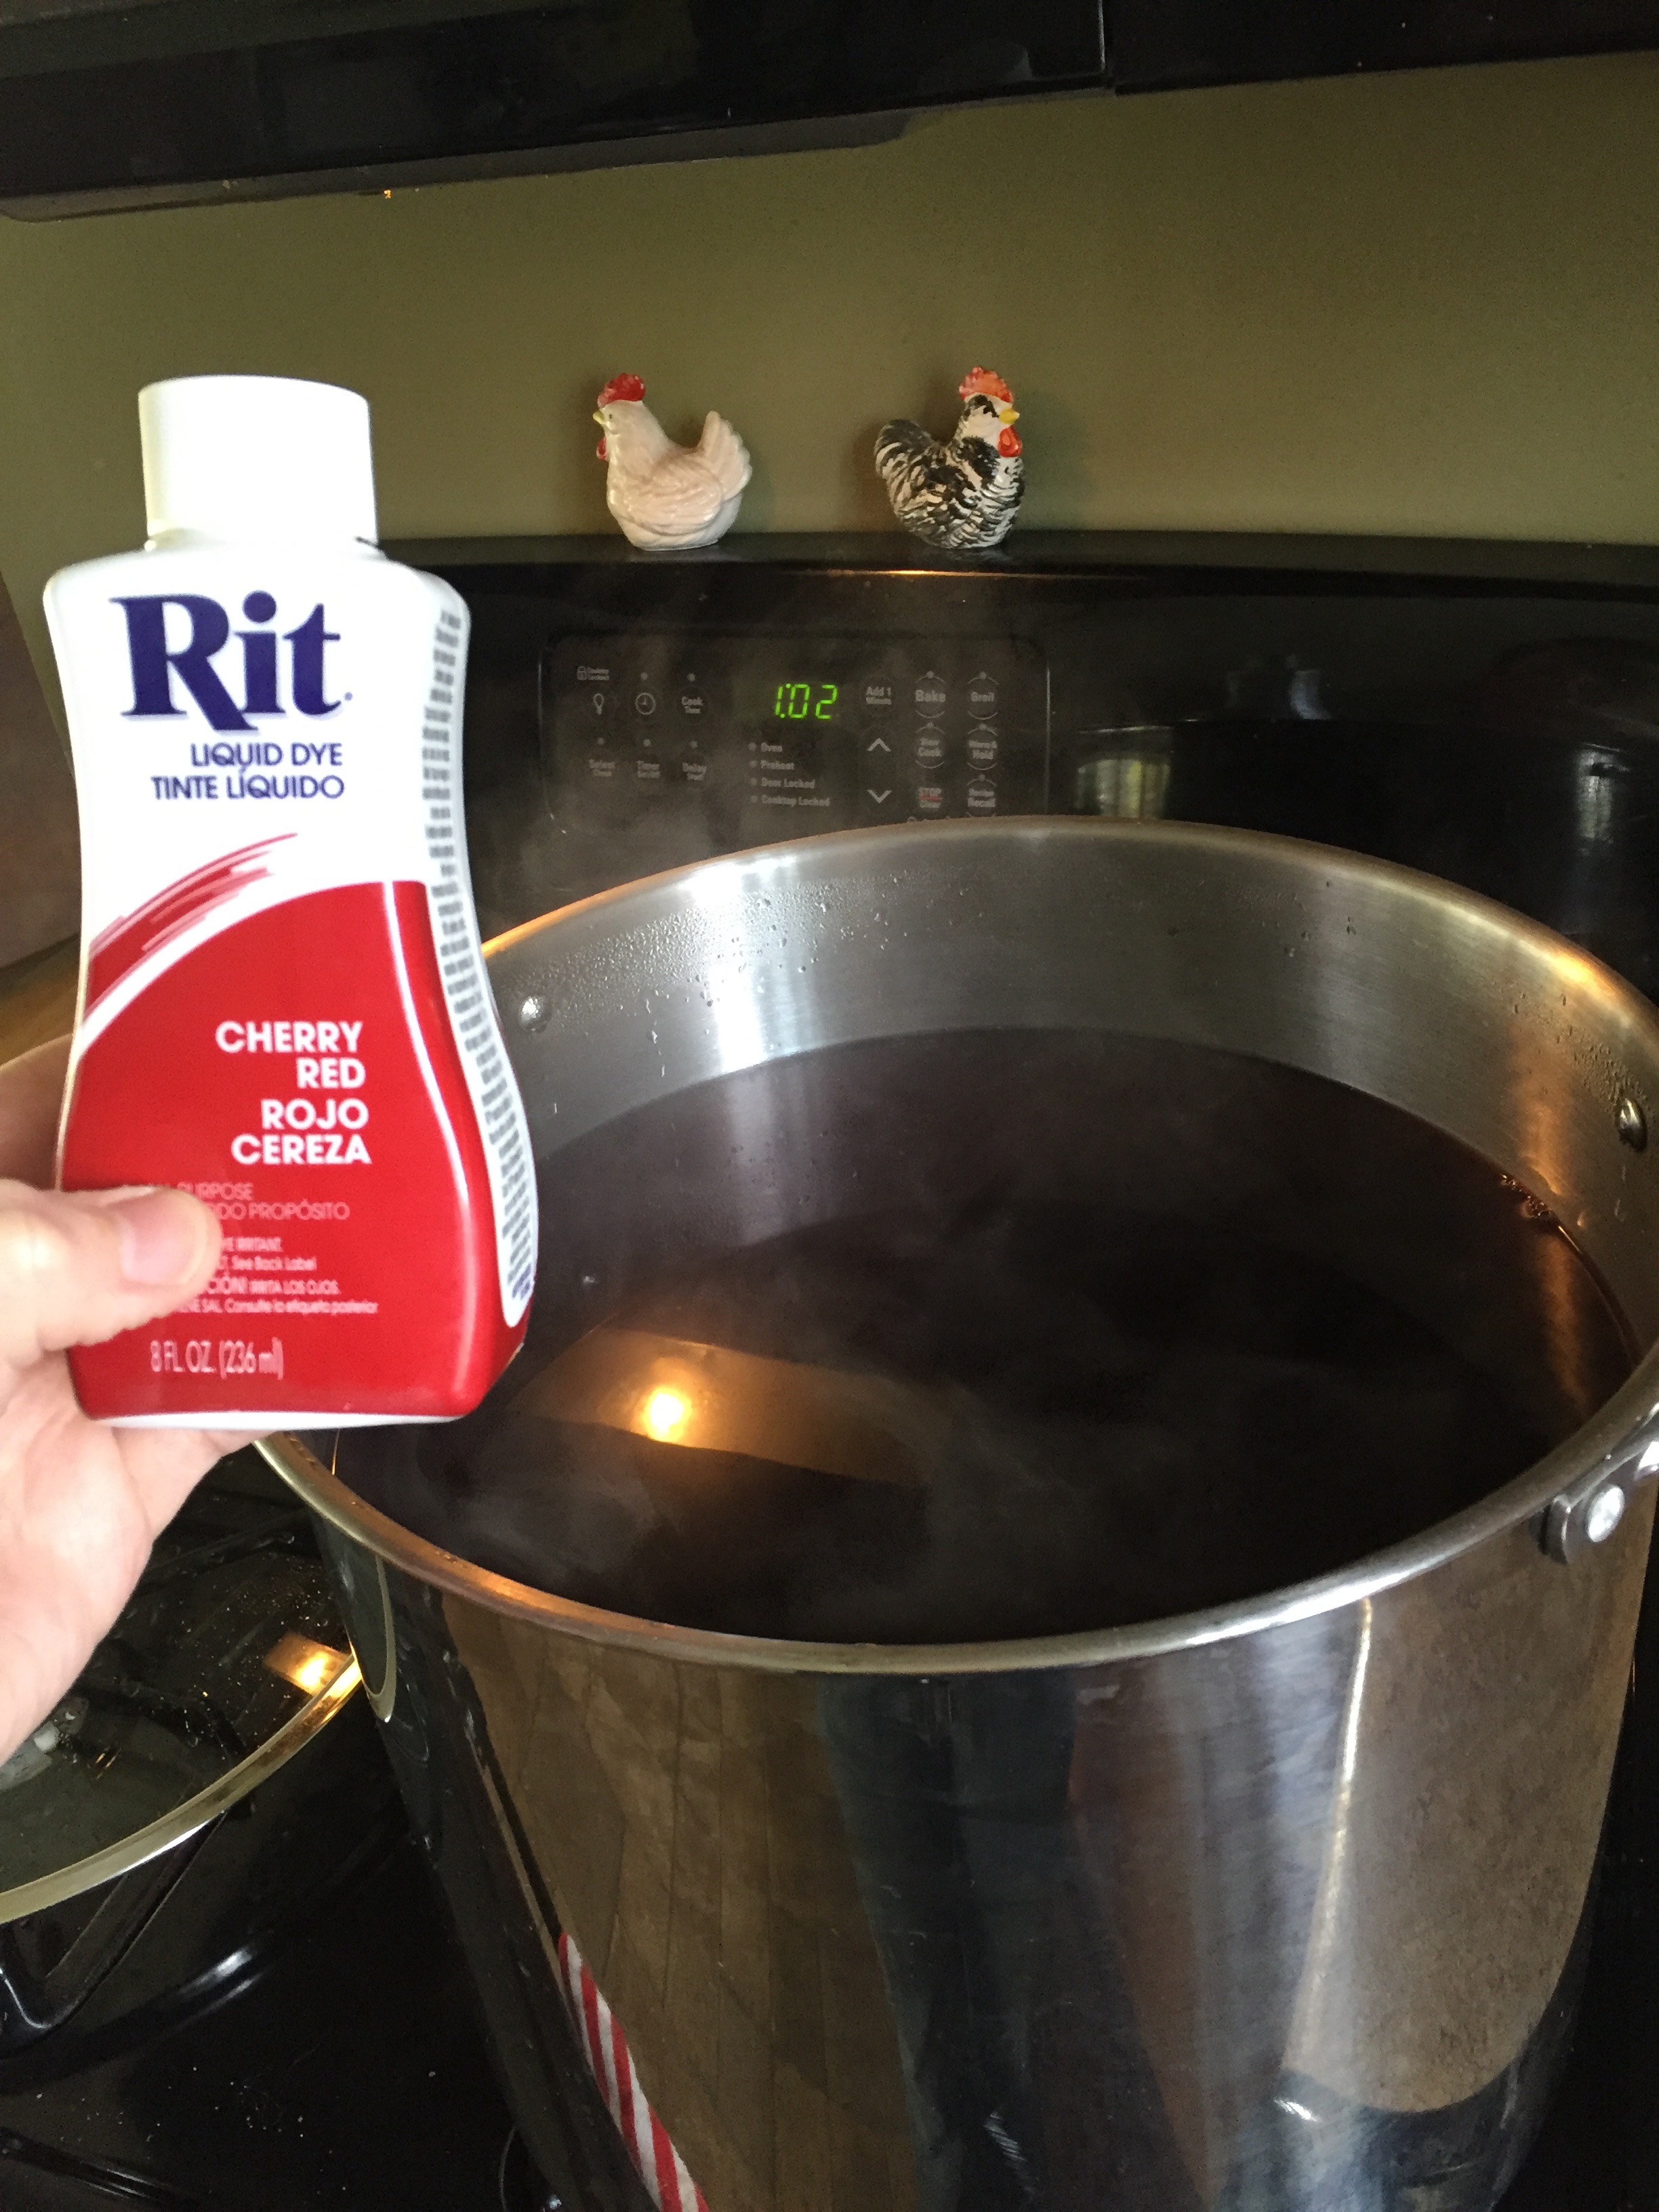
Once you have all the glue that you want on the lacrosse head, start by filling up the pot of water and bringing it to a boil. Carefully dump the Rit Dye in the pit. Be very careful when working either dye because it stains and will change the color of any towels you may be using. There will need to be an adult present to help with with this project.
Use the head to start gently stirring the pot to mix the dye up with the water. Let the lacrosse head drop into the pot of water and check on it after a few minutes. Depending on the color you want the head to turn, you might need to leave it in there a few minutes or over an hour. We actually started it before my sons hockey game, went to his game and came back and then took it out and rinsed it off.
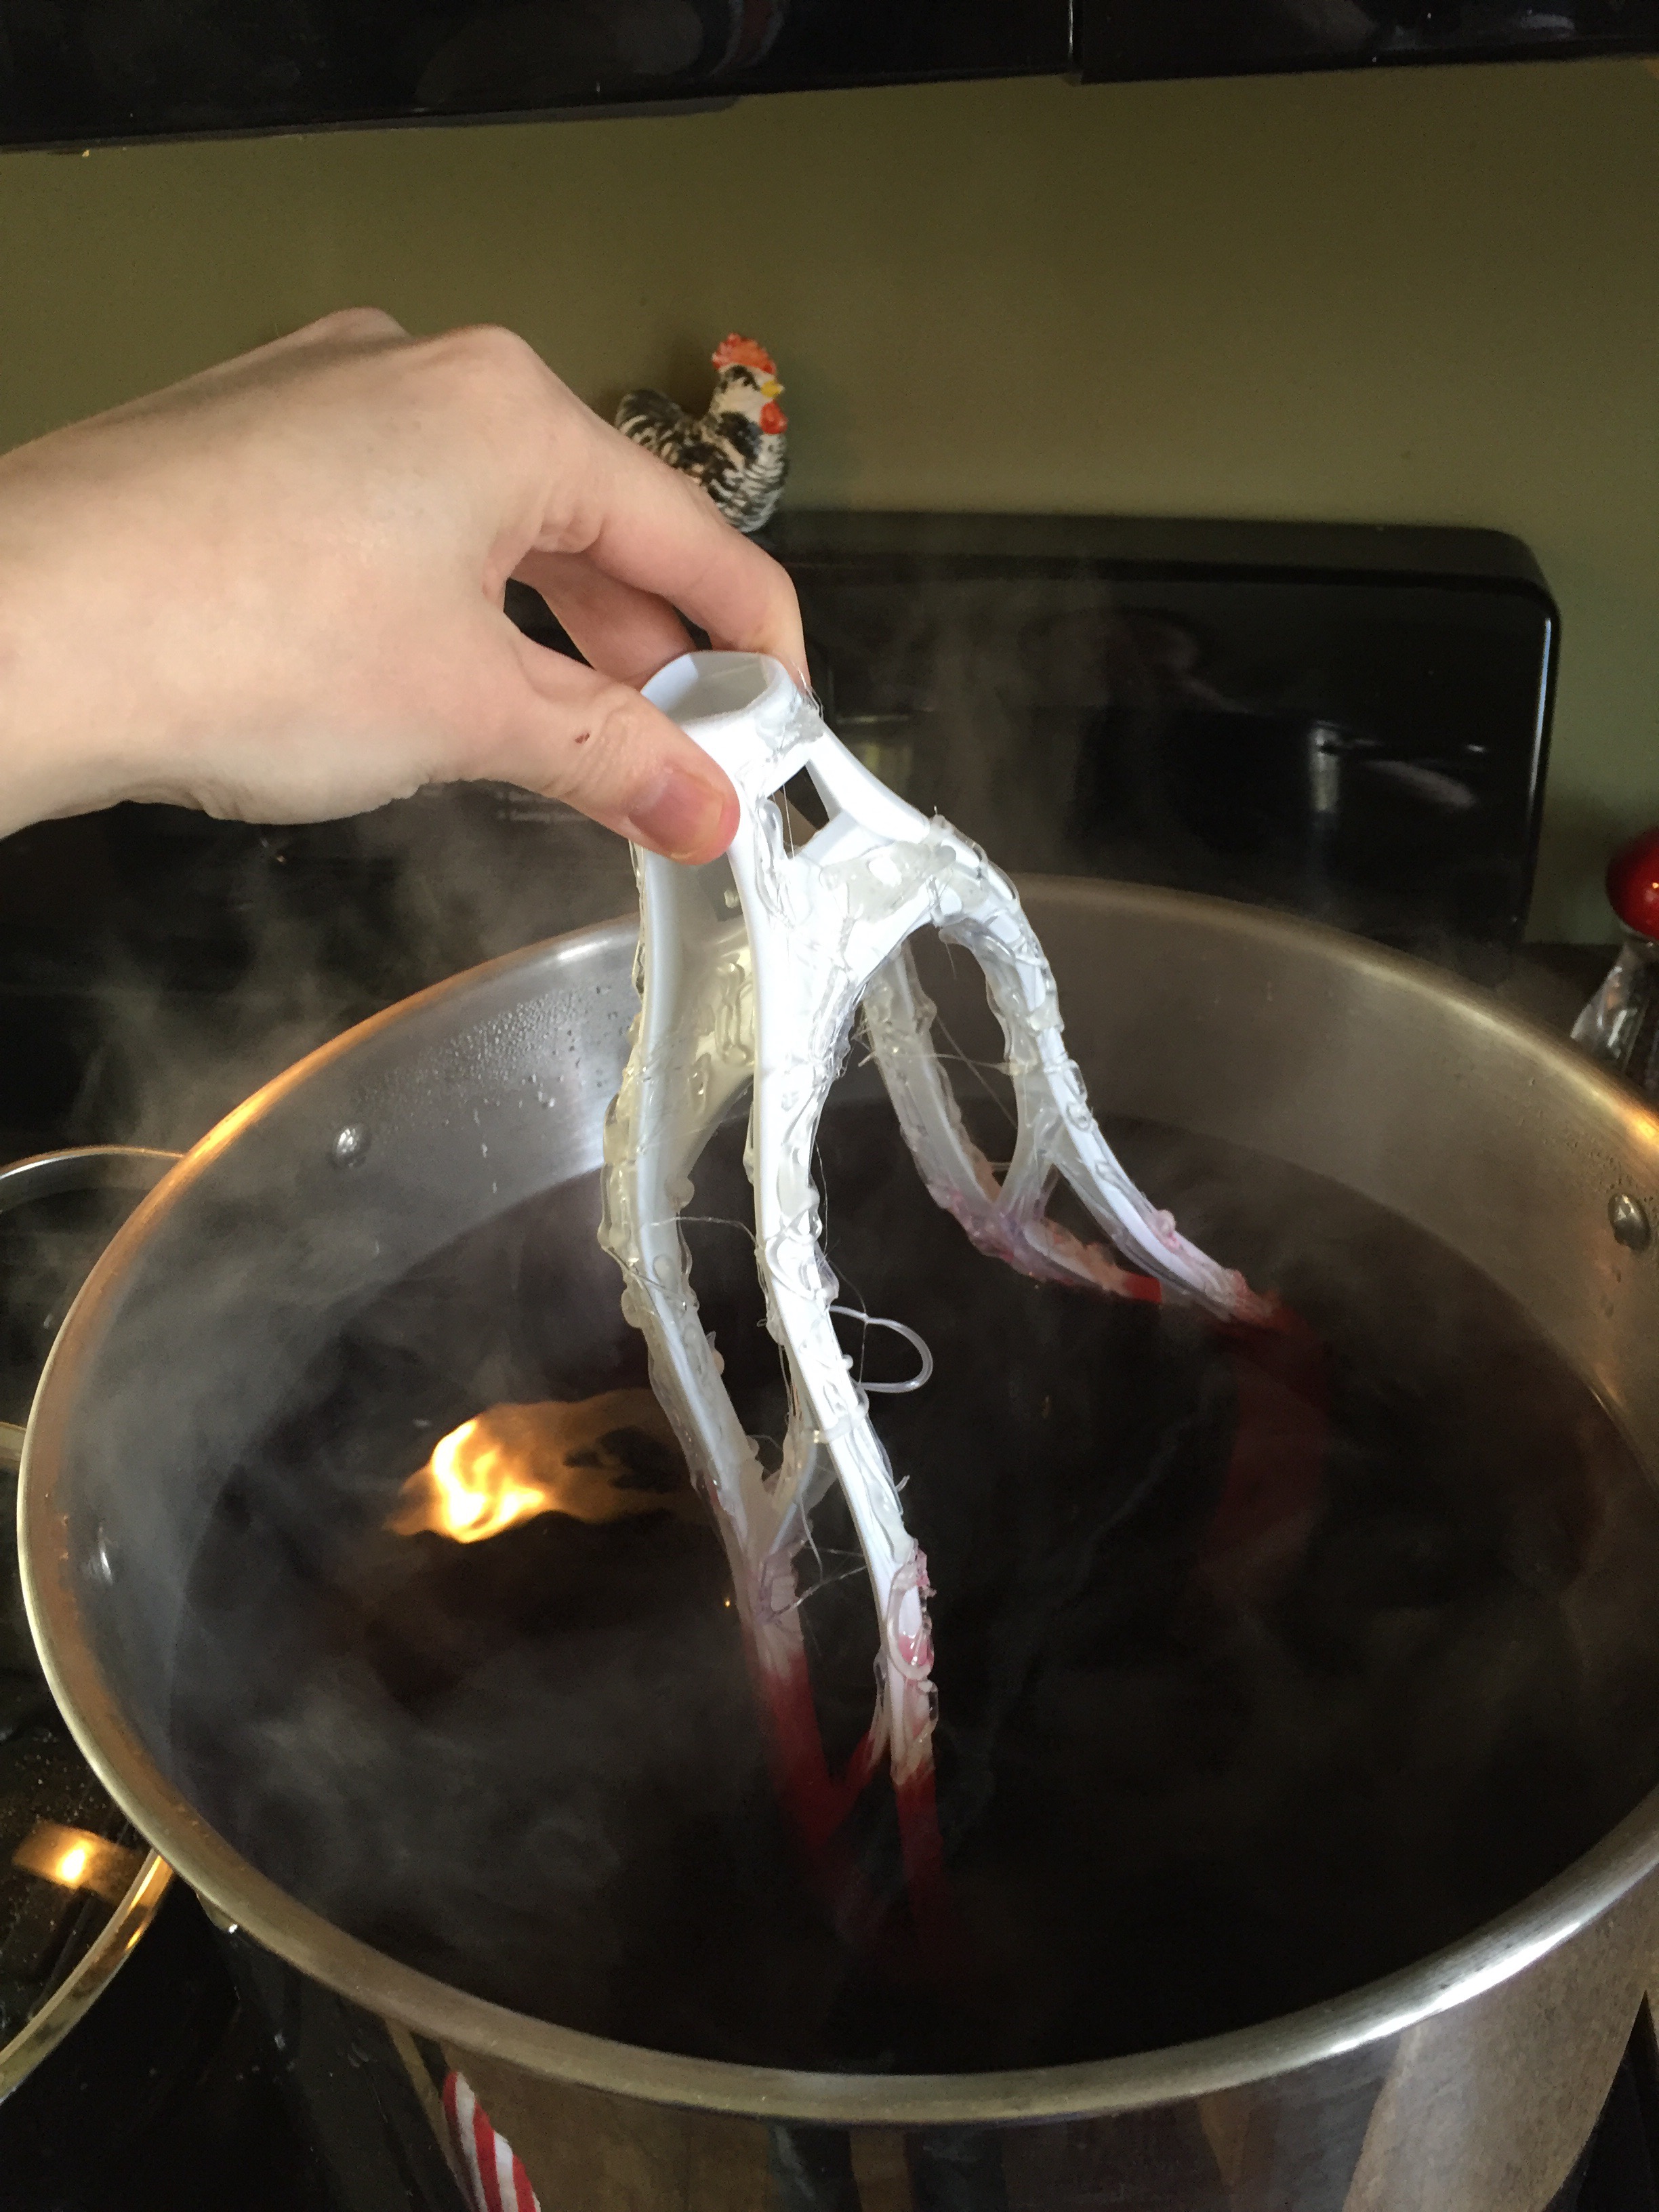
You will want to make sure you have towels around when you take it out so you don’t drip all over the counter. Use cold water to rinse off the lacrosse head until it runs clear and no more dye is on the head.
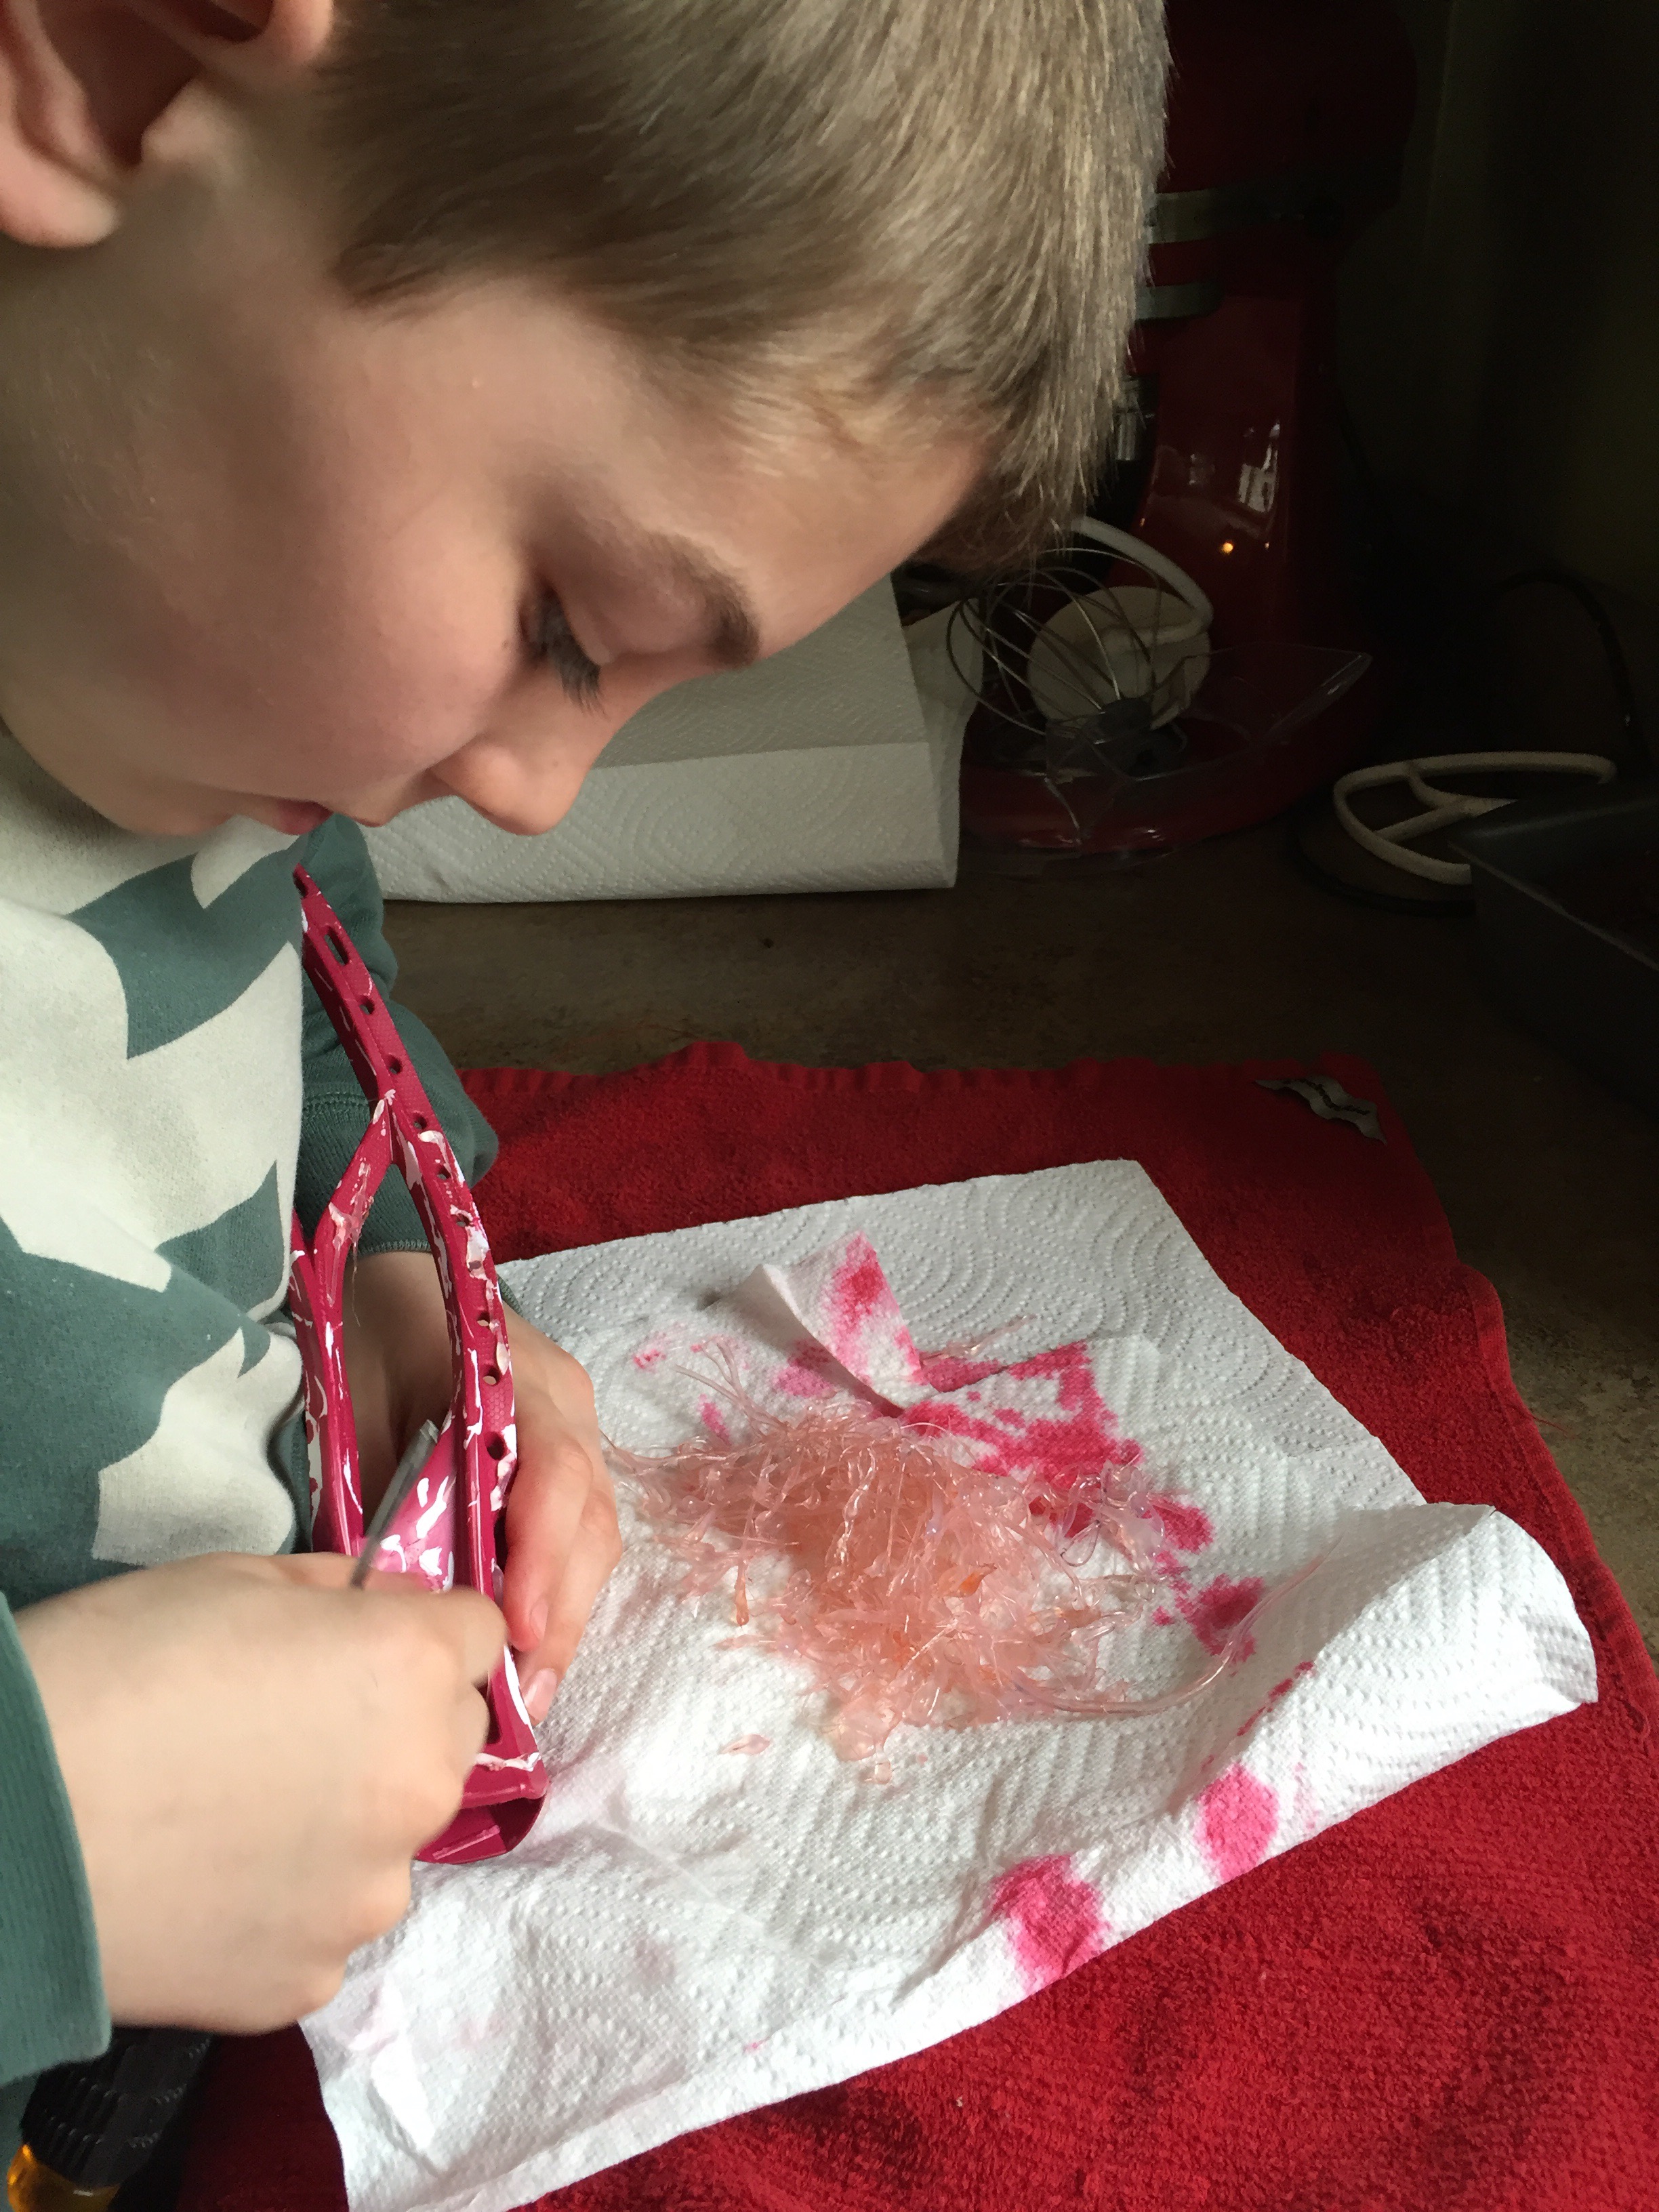
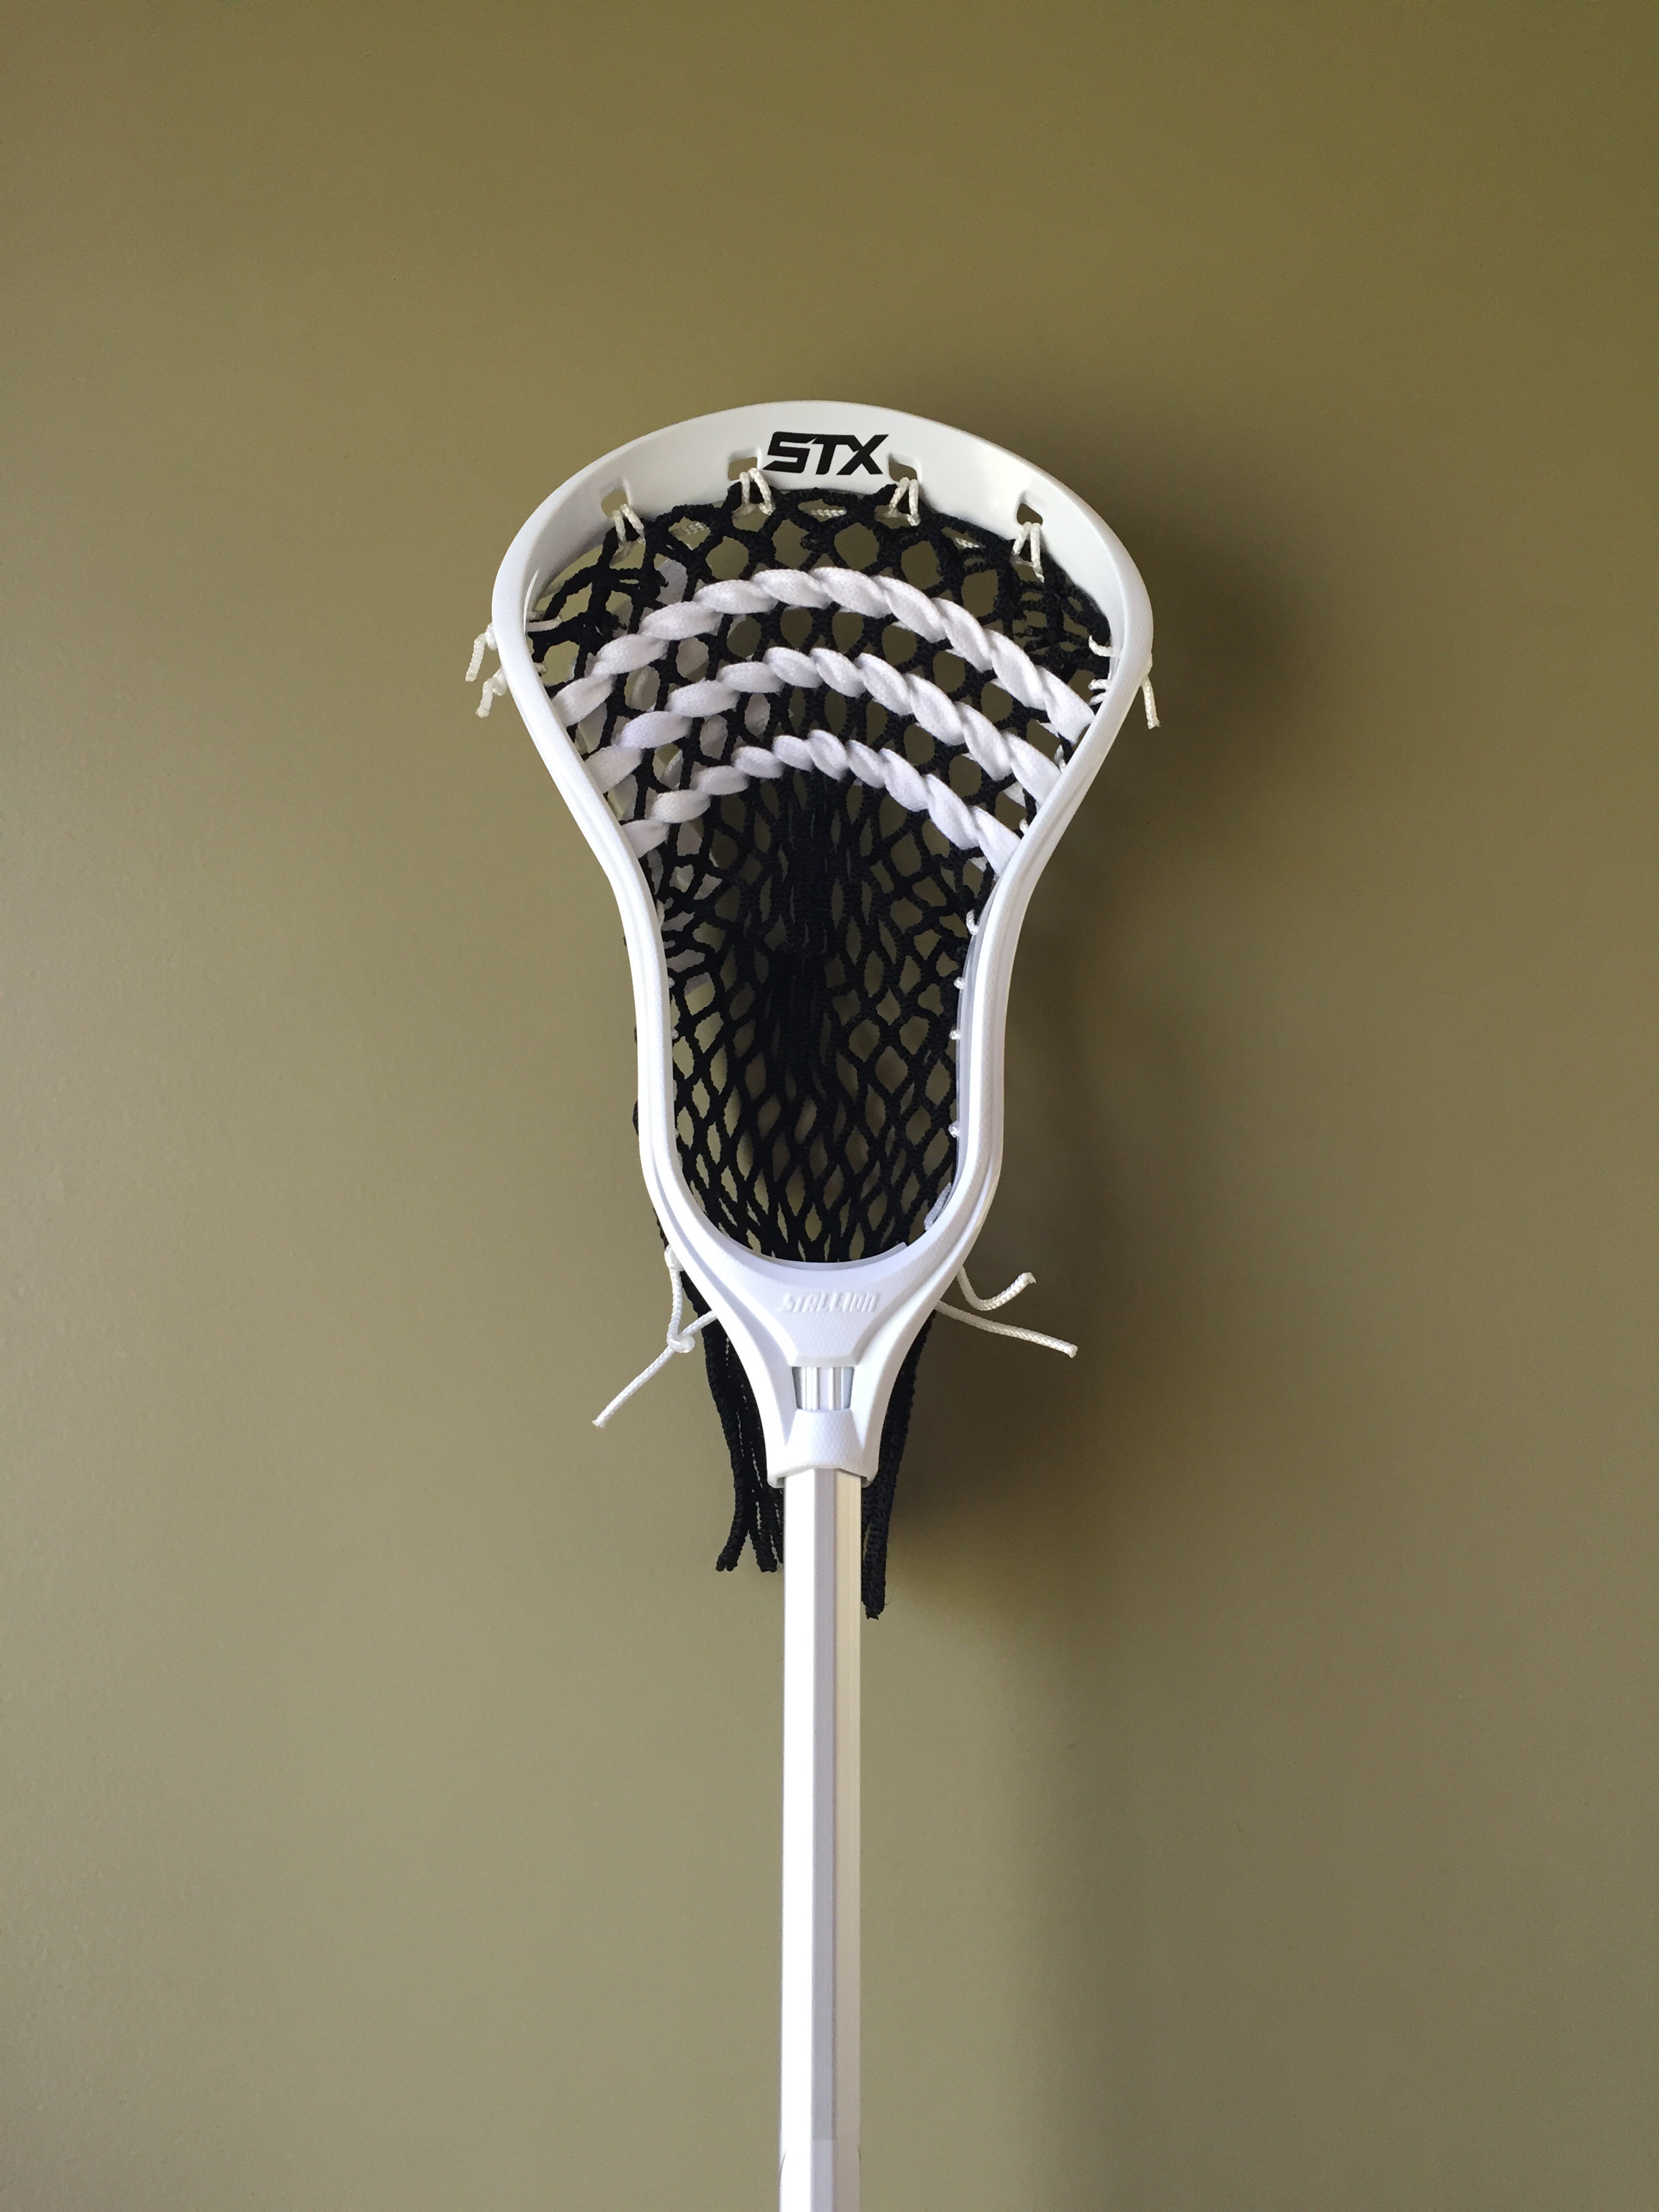
Once this part is done you can start peeling all the glue off the head and see the awesome creation you made. Make sure and peel all of the glue off so it won’t mess it up later.
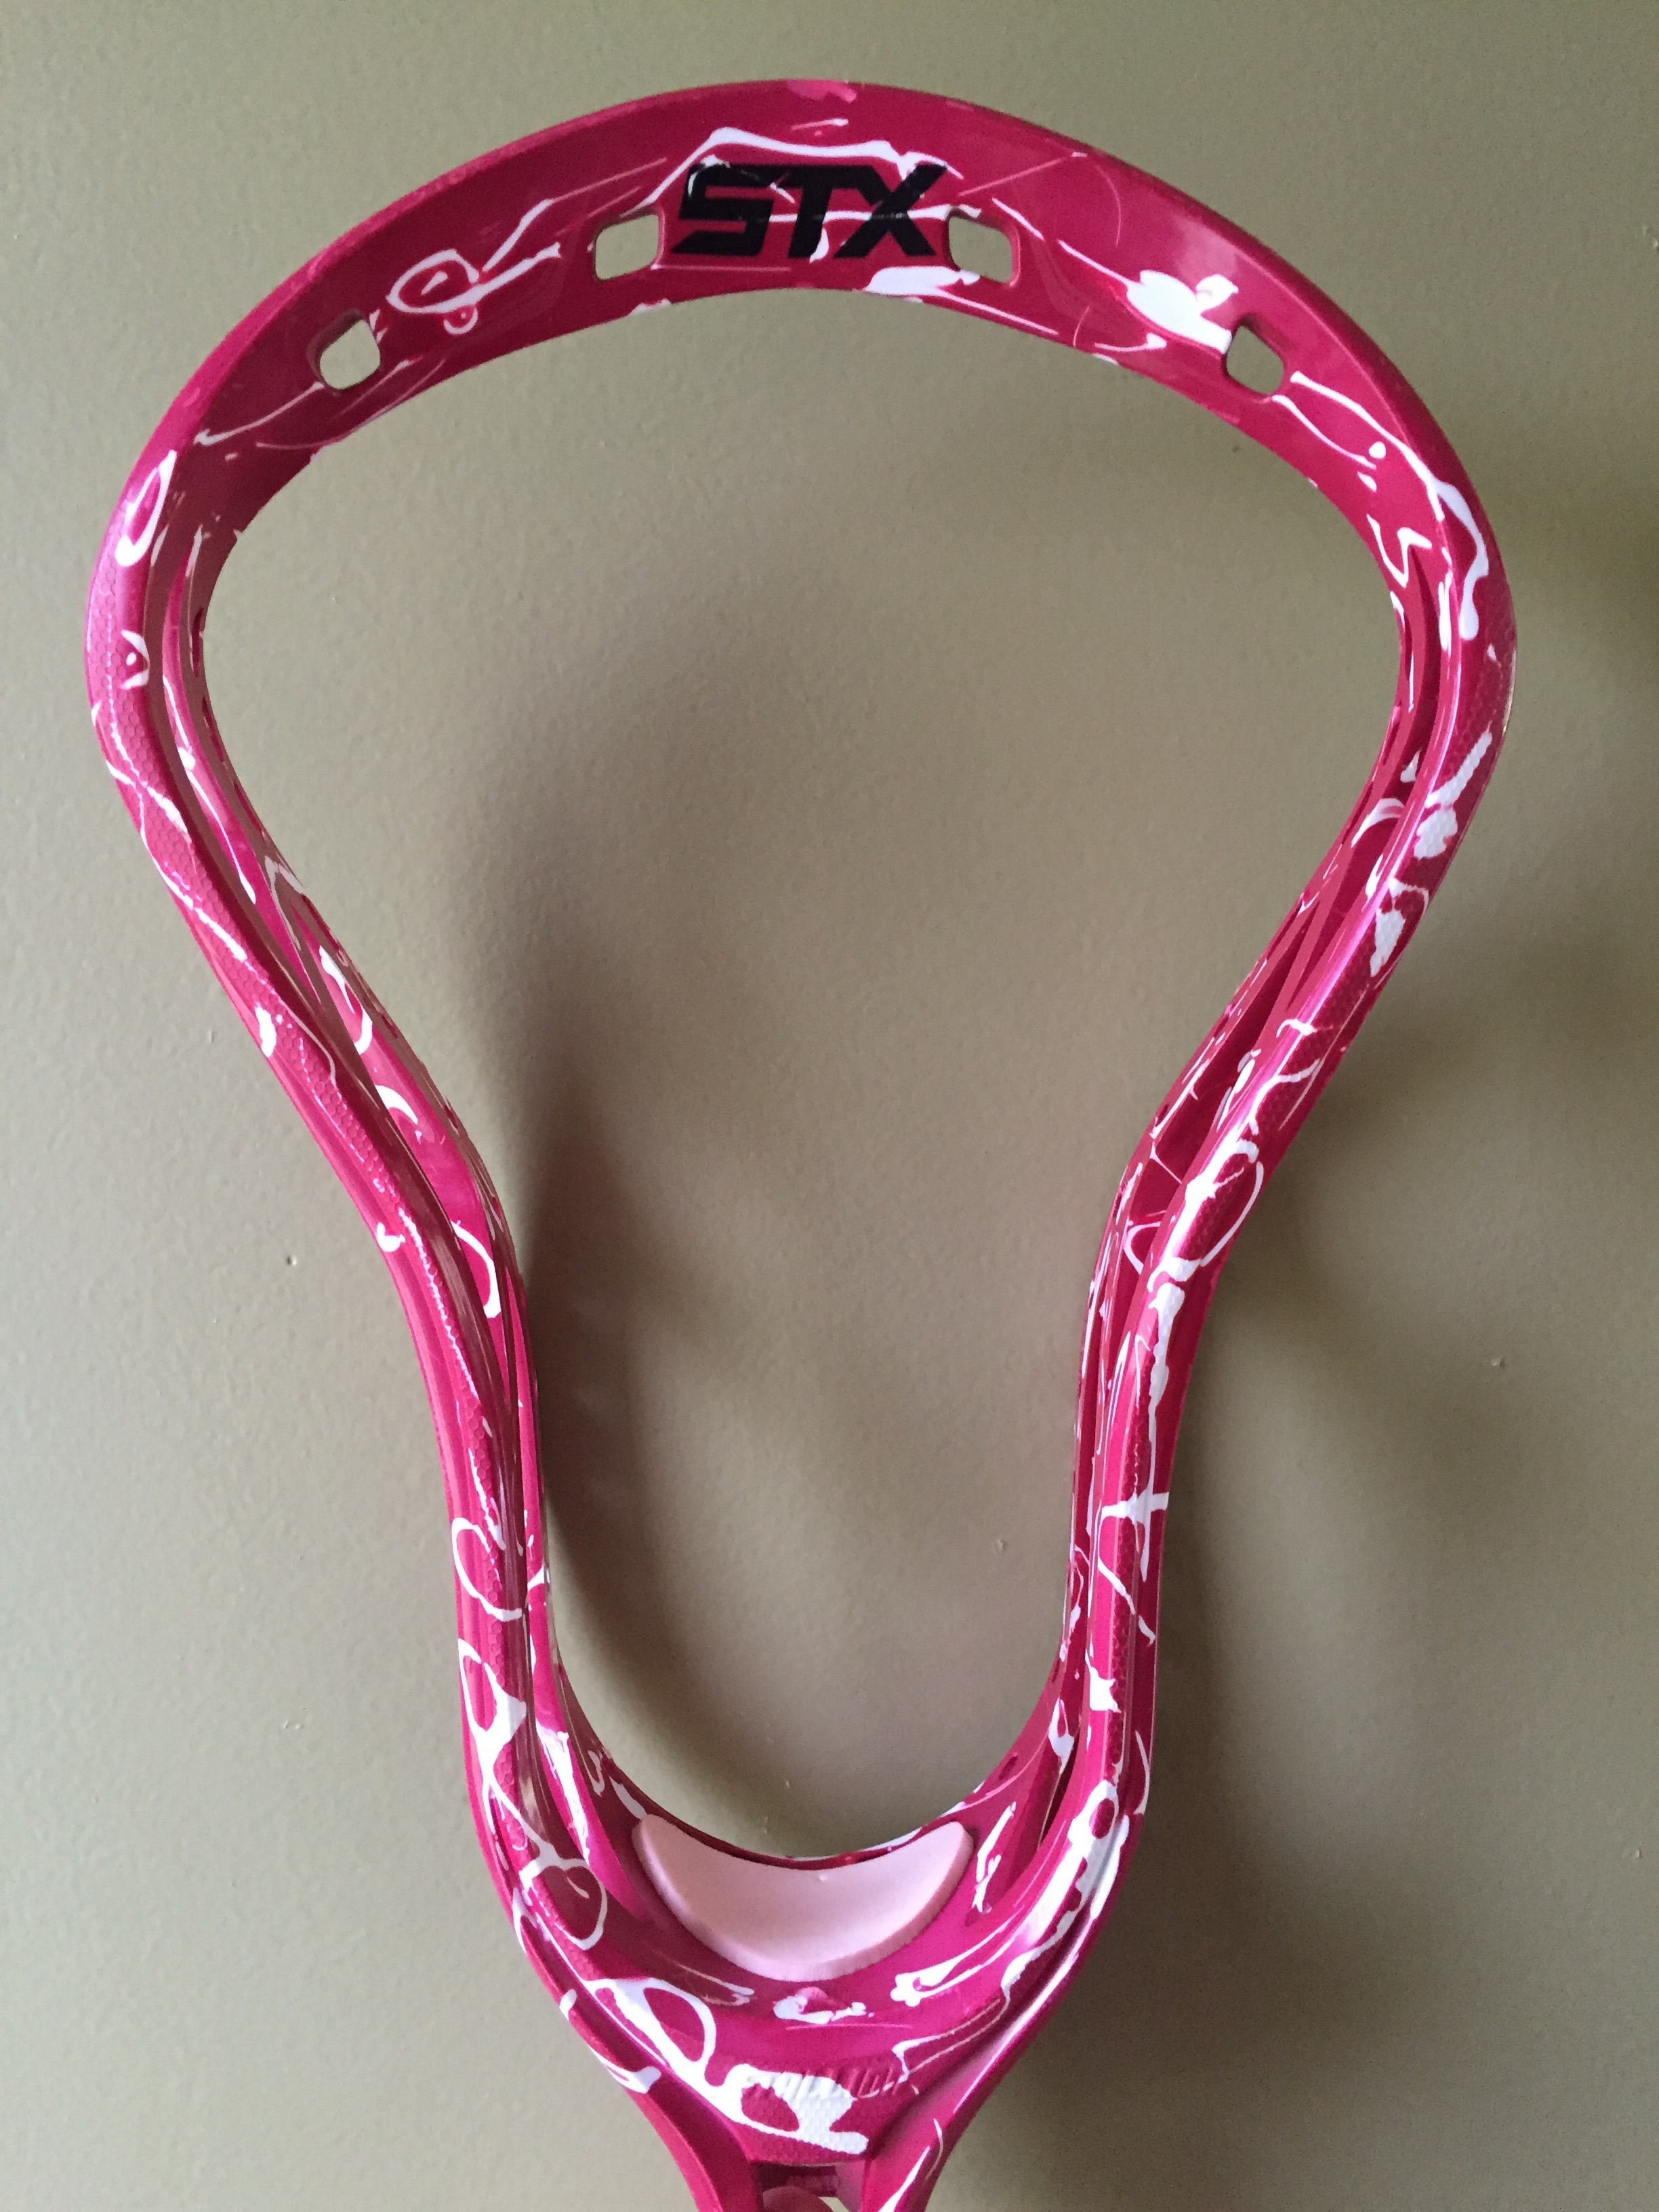
TADA!!! It’s done!! You can now restring the head and use it!! My son decided to put red mesh back into the stick instead of the black that came with it.